 Relistic
Add and edit items
Add an item by hand, choose which stores it goes on, set a different price per store, and keep your inventory organized.
Every item in Relistic is one master record: title, description, price, quantity, condition and photos. You tick the stores it should appear on, and Relistic keeps all of those listings matched to it.
Add an item
- Click Inventory in the left menu.
- Click Add item in the top right.
- Fill in the Title, Description, Condition, Brand, Price (USD) and Quantity. The SKU is filled in for you, but you can change it.
- Optional: type What you paid. Only you see it; the dashboard uses it to work out your profit.
- Optional: add Tags, your own groups separated by commas, such as
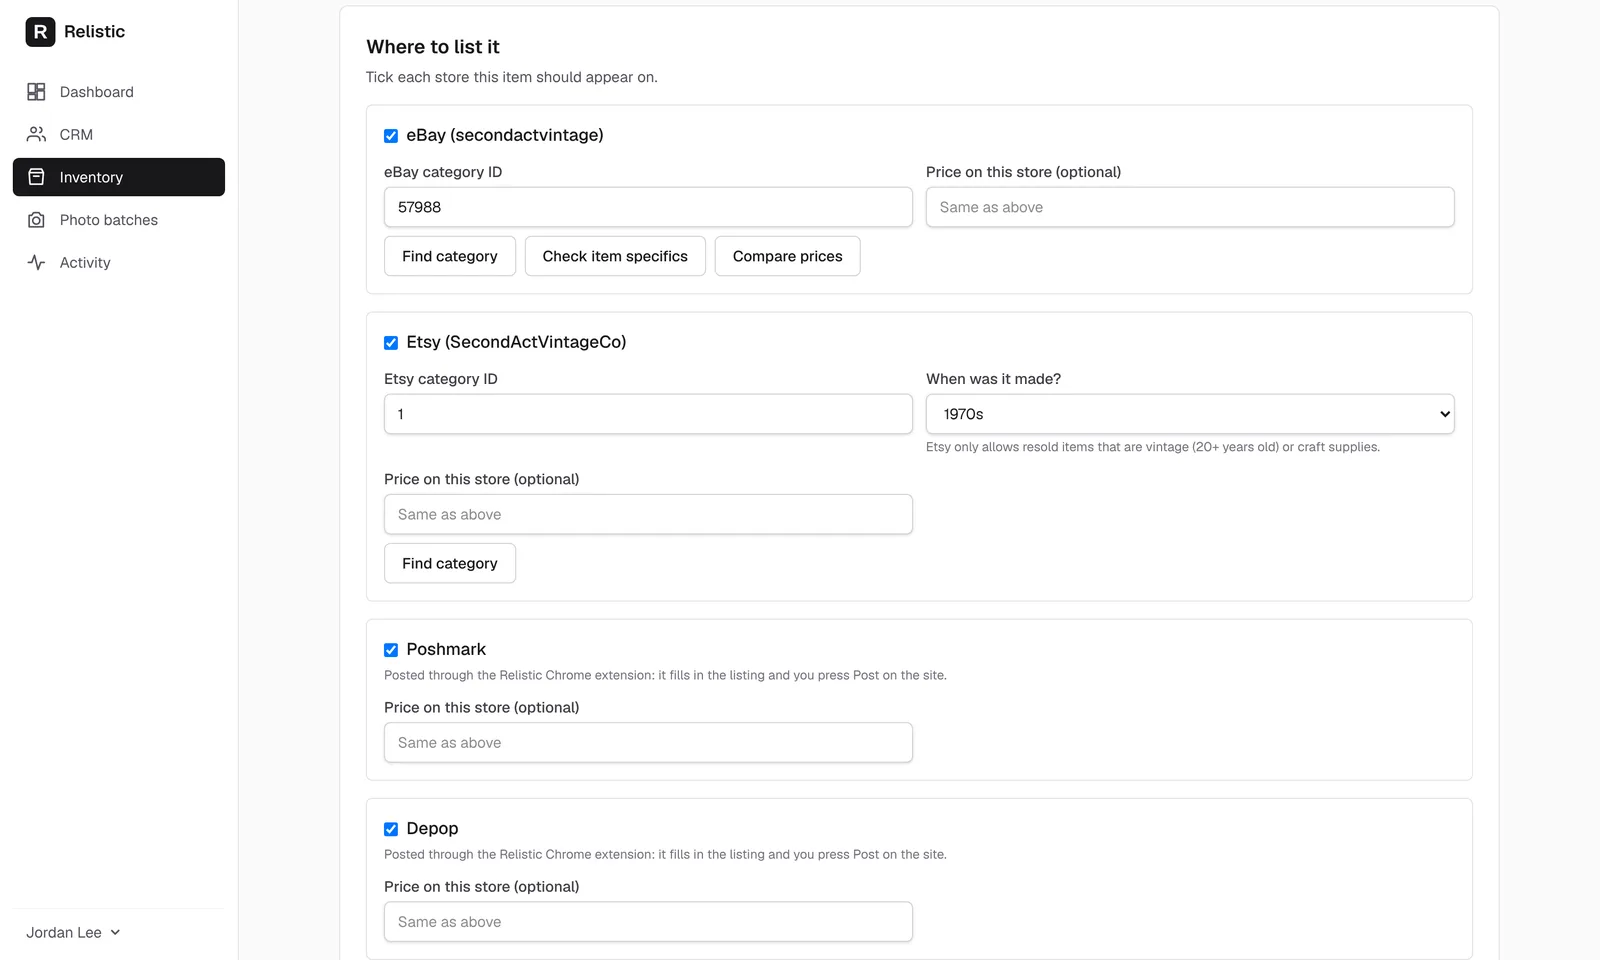
Bin 4, Women's denim, and Private notes. Only you see these; they're never sent to a store. - Under Where to list it, tick each store this item should appear on.
- Set Status to Active (list on the stores ticked below). Leave it on Draft if you're not ready; drafts aren't listed anywhere.
- Click Save + Sync. Relistic posts it to each ticked store and shows the result on the item.
Save or Save + Sync? Save keeps your changes in Relistic only, which is handy while you're still working on an item. Save + Sync also sends them to your stores.
Photos
The quickest way to add photos is a photo batch, even for a single item. You can also click Add or edit photo links and paste links to photos that are already online, one per line.
On the item page:
- The first photo is the main one. Use the ← and → arrows under a photo to change the order.
- Click a photo to see it bigger.
- Click Delete under a photo to take it off the item.
- Click Remove background to cut the item out and put it on a white background. It's free and runs on your own computer or phone; the first time takes a minute to get ready. The new photo goes next to the original, and Undo puts the original back.
Photo changes are kept when you click Save or Save + Sync.
Store-specific details
Some stores need extra details. Relistic asks for them on the item when that store is ticked:
- eBay: a category and its item specifics. Use the category finder on the item page, and click to fill the specifics eBay requires with AI.
- Etsy: a category and When was it made?
- TikTok Shop: a category is optional; if you leave it empty, Relistic uses the one TikTok suggests for the title.
Compare prices
Click Compare prices in a store's section on the item page to help you price:
- Sold prices on eBay: how many similar items sold in the last 90 days and for how much, with a button to use the middle (median) price. Until eBay approves Relistic for sold-price data, this says Sold prices: coming soon.
- Asking prices of similar items for sale now on eBay and Etsy. These aren't sold prices.
A different price or title on one store
- On the Inventory page, find the item, click Options ▾ on its store (for example eBay) and click Edit for eBay. If it isn't on that store yet, click List on in its store column instead.
- In the pop-up, change the title, description, condition, price or photos for that store only.
- Click Save.
Anything you leave empty uses the item's main details.
Edit an item
Click the item on the Inventory page, change anything, and click Save + Sync. Relistic updates every store it's listed on. If a store had a problem, click Sync now to try again.
Remove an item
On the item page, click Archive and end listings. The item ends on every store and moves to the Archived tab, so your history and profit numbers stay correct.
Find items fast
See Find and organize your inventory for tabs, filters, favorites and duplicates, and Bulk crosslist to list many items at once.
Still stuck? Email angela.b@apeirosmarketing.com and we'll help.